How
To Use One Touch Ulta Glucometer
In this guide we will explain how to use the One
Touch Ultra Monitor. Step-by-Step Test Procedure
STEP
1 - Insert Test Strip
Insert a test strip, contact bars end first and
facing up, into the test port.
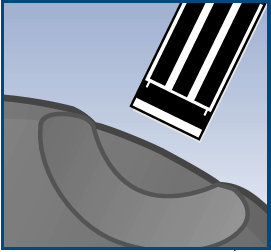
Push
it in until it will go no further. The meter will turn on and the display check
will appear briefly. Then the code number will appear, followed by the symbol
with mg/dL.
Check to make sure the code number
on the meter display matches the code number on the test strip vial. Always confirm
that the unit of measure is mg/dL when you test
your blood glucose level. WARNING:
If mg/dL does not appear with the symbol, call LifeScan Customer Service at 1
800 227-8862. Use of the wrong unit of measure may cause you to misinterpret your
blood glucose level, and may lead to incorrect treatment. Be sure the meter and
test strip codes match. If they do not, code the meter correctly. CAUTION:
Matching the code on the meter and the code on the test
strip vial is essential
to obtain accurate results. Each time you test, check to make sure the code numbers
match. Step 2 - Get a Blood Sample
Obtain
a round drop of blood using the lancing device. The blood sample must be large
enough to fill the confirmation window.
Step
3 - Prepare to Apply Sample
Keeping
your finger extended and steady, move the meter and test strip toward the blood
drop.
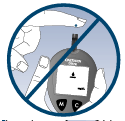
Do
Not apply blood on the top of the test strip.
Do
Not hold the meter and test strip underneath the blood drop. This may cause blood
to run into the test port and damage the meter.
Step
4- Apply the Sample
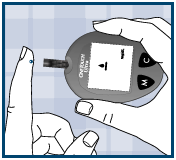
Line up the test strip
with the blood drop so that the narrow channel on the edge of the test strip is
almost touching the edge
of the blood drop.
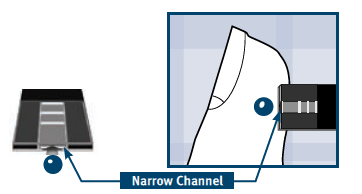
Gently
touch the channel to the edge of the blood drop.
Be
careful not to push the test strip against your fingertip or the test strip may
not fill completely.
NOTE:
• Do Not smear or scrape the drop of
blood with the
test strip.
• Do Not apply more blood to the test strip
after you have moved the
drop of blood away.
• Do Not move the test
strip in the meter during a test.
CAUTION: You may get an Er5 message
or an inaccurate result if
the blood sample does not fill the confirmation
window completely. Discard the test strip and re-start the test process.
Step
5 - Wait for the Confirmation Window to Fill Completely.
The
blood drop will be drawn into the narrow channel and the confirmation window should
fill completely.
When the confirmation window
is full, this means you have applied enough blood. Now you can move the test strip
away from the blood drop and wait for the meter to count down from 5 to 1.
If
the confirmation window is not full, you may get an error message
or an inaccurate
test result. Step 6- Accurate Results in
Just 5 Seconds
Your blood glucose test result
will appear after the meter counts down from 5 to 1. Blood glucose test results
are automatically
stored in the meter memory. You may also
record them in the logbook provided with your system. Turn the meter off by
removing
the test strip. Dispose of used test strip in a sealed container.
And
That's It
As can be seen from above the One Touch
Ultra Monitor is very easy to use. If you are interested in purchasing this meter
visit: http://www.glucosemeters4u.com/OneTouchUltra.htm
If
you've found this guide useful and already have a One Touch Ultra monitor you
can also purchase One Touch Ultra test strips from us, visit:
http://www.glucosemeters4u.com/OneTouchUltrateststrips.htm |